

Roman Blind Heading with No Visible Stitching
This guide details how to make a faced heading at the top of a Roman blind which is firm and stable without any visible stitches.
1.
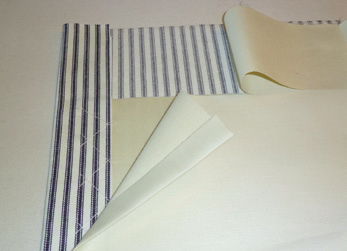
Prepare your face fabric and lining in the normal way. You should allow around 8 cms of face fabric at the top of the blind to make the facing. Trim the lining and any interlining to the EXACT finished drop of the blind.
2.
Cut a 4 cm wide strip of single sided fusible buckram, half a centimetre smaller than the finished width of the blind. Place the buckram with fusible side facing the wrong side of the excess face fabric at the top of the blind.
3.
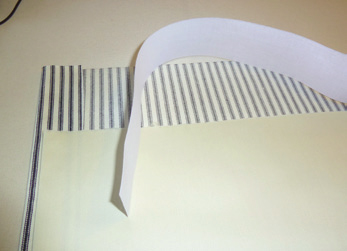
Insert the buckram under the side hems, and position it just a few millimetres above the top edge of the interlining. This small gap allows the top edge of the blind to be folded over without too much bulk.
4.
Use a hot iron to fuse the buckram in place. Fold the side hems so that they taper inwards very slightly and press.
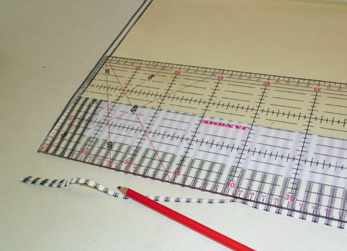
5.
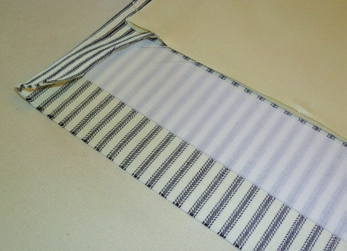
Trim the excess face fabric to 3 cms. Use a clear acrylic template to quickly measure and mark.
6.
Fold the raw edge over the buckram and press.
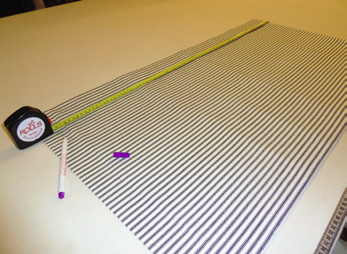
7.
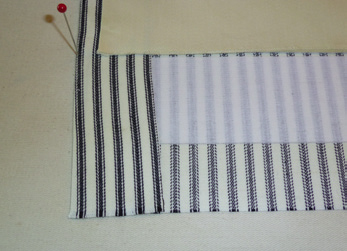
Now turn the blind over so that the right side is facing you. Measure up from the bottom of the blind and mark the finished drop of the blind PLUS 0.5 cm. Use a fading marker or chalk marker to draw a line across the measured points. (This line will not be seen on the right side of the blind).
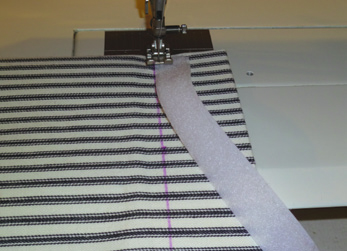
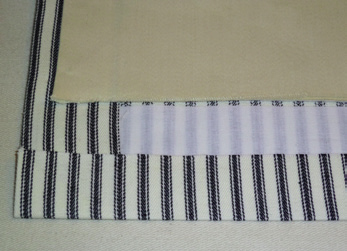
8.
Machine stitch Touch & Close loop so that its top edge is exactly on this measured line. You are sewing through the Touch & Close tape, face fabric top flap and buckram here, not the face of the blind itself.
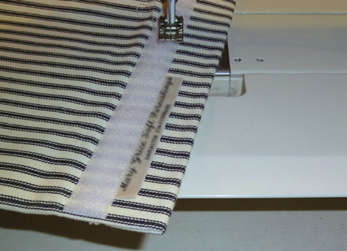
9.
Then machine along the bottom edge of the Touch & Close tape. This row of stitching should catch the free edge of the face fabric which was folded under the buckram. This is a good place to enclose your makers label if you have one.
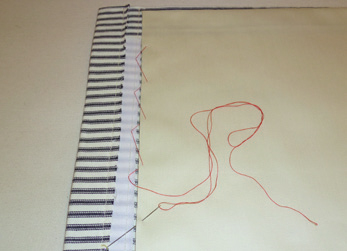
10.
With the wrong side facing you, starting at one side of the blind with a strong thread, make large stitches catching the top raw edges of the lining and interlining to the top row of machine stitching that you used for the Touch & Close tape. This prevents the top edge of the lining and interlining from sagging inside the blind.
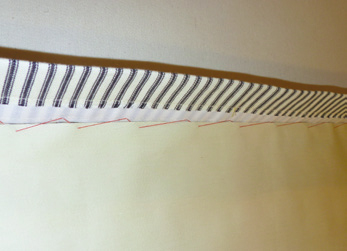
11.
Use one continuous thread for this, so that you can gently pull on it when you get to the other side, thereby helping the facing to lie flat.
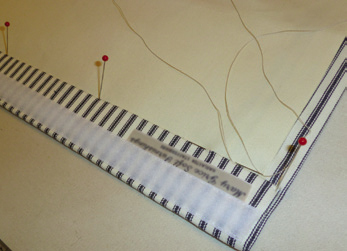
12.
Fold the facing over to the wrong side and secure with pins. Slip stitch the side and bottom edges of the facing to the blind. Do not pick up the face fabric in these stitches.

13.
This produces a heading which is has no visible stitches on the face side, and yet is stable and firm enough not to sag or roll forward.
Contributed by Mary Grice
Mary runs a Bespoke Soft Furnishing business based in Harlaston, Staffordshire.
City and Guilds trained and with over 30 years experience in the craft, she quotes attention to detail and a passion for working with beautiful fabrics as her driving force.
She specialises in bespoke Roman blinds and the faced heading technique is an example of her working method.
Hallis Hudson products used in this how to...
H152 |
Bonded cotton sateen / fleece Interlining |
H652 |
Premium UK Satin Lining |
|
3482R |
Single sided fusible buckram |
7805040 |
Strong hand sewing thread |
|
2004R |
20mm White touch & close loop |
XR60 |
Clear Acrylic Template |
|
1699R |
Tape Measure |
0909R |
Rolls Roman Blind Kit |